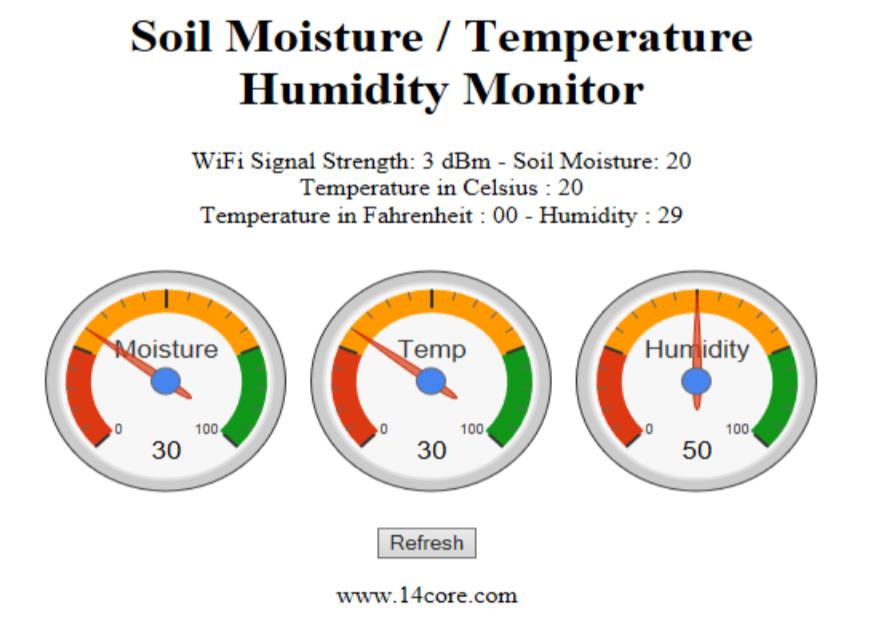
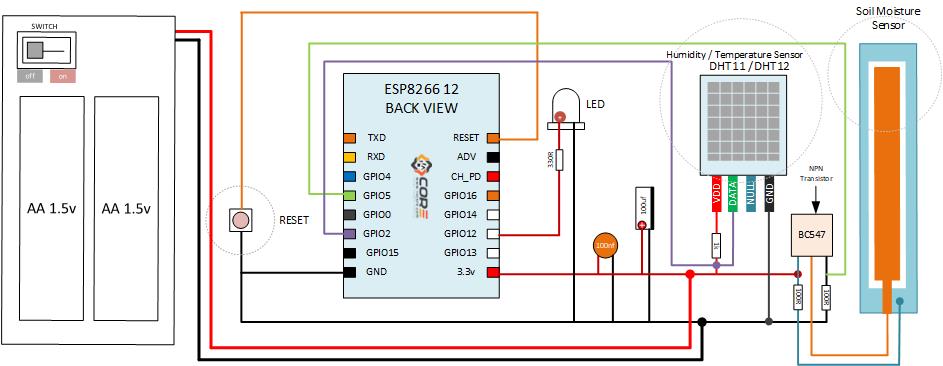
Another illustration that demonstrate how to use the ESP8266 as a web-based Soil Moisture / Temperature and Humidity Monitor. If you’re new to ESP8266 please refer to this link. There are 3 main component are used to this project. The ESP8266, DHT11/12, and the Soil Moisture Sensor, as you can see the diagram below there are 3 sensors to accomplish this projects the ESP8266 WiFi Transceiver, two plate soil moisture, and the DHT11 Temperature & Humidity sensor. This project also tested in ESP8266 12E NodeMCU, ESP8266 Version 7, ESPDuino, WeMos Board.
Required Components
- ESP8266 12, 12E, ESP8266 NodeMCU, ESPDuino, WeMos.
- Soil Moisture Sensor Module or Build your own Sensor
- DHT11, DHT12 Sensor or DHT11 / DHT12 Module
- NPN Transistor (Optional)
- Two Conducted Plate (Optional)
- 2 Battery Case for 3.3v Out / 2 Double A Battery (For Stand Alone Option)
- LED (Any Color)
- Resistor (See the diagram below for value reference)
- Capacitors (See the diagram below for value reference)
- USB TTL UART (For Programming the ESP8266)
- Solder Less Bread Board
- Jumper Wires
Flashing Guide
For flashing using NodeMCU to ESP8266 12 or Flashing with ESP8266 Download Tool just follow this link & for ESP8266 Arduino Integration just follow also this link or if you are using MAC OS refer to this link Note: The AT command must be end with “\r\n”. For Arduino, must type the AT command like this > Serial1.print(“AT+GMR\r\n”);
Wiring Guide
Source Code
[crayon-691d95af375c6312027450/]
Downloads
- Download ESP8266 WifiClient & ESP8266Wifi | Zip
- Download ESP8266 WebServer | Zip
- Download ESP8266 Flash Tool | Link
- Download NodeMCU Flash Software | Link


