Yet another illustration, this illustration demonstrates making a remote controlled rover robot base on 433MHz RF Link radio module, Joystick and with L298n and l293d H-Bridge motor controller you can choose which suit to use for the motor controller. As you can see the illustration below their two type of RF configuration one is the receiver and one is the transmitter just follow the illustration below for wiring and connecting the motor controller.
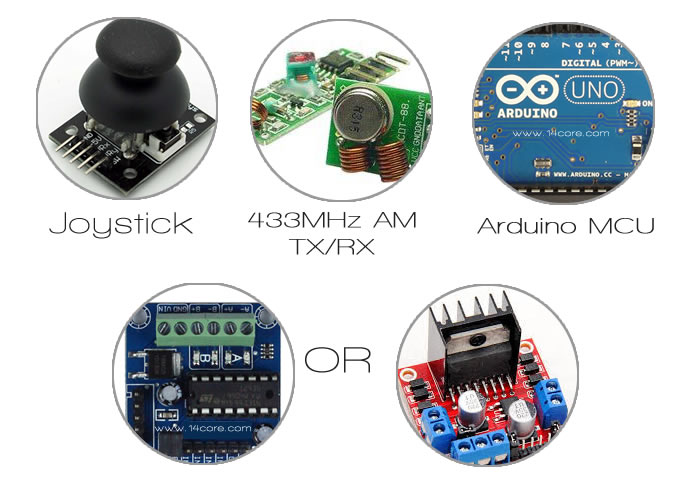
Required Components
- 2 Arduino UNO/MEGA / NANO
- RF Link 433MHz AM (Transmitter & Receiver)
- Aluminum Box or Cardboard Box / Old Car Toys
- Joystick Breakout Module
- Wheels / 4 Wheels to be plug directly to the motors
- 2 DC Motors or 4 DC Motor ( See the wiring diagram for 4 DC Motors)
- DC Motor will generate a spike and it disrupt the signal to the communication device, so you need to suppress by using capacitors to all the motors. see the diagram for wiring the motors to the H-Bridge
- Jumper Wires / 1mm Wires
- Battery
Rover Robot Diagram
Wiring Diagram for the Motor Controller / Wiring Diagram for the Transmitter / Wring Diagram for the Receiver
Sketch Code for Transmitter
1 2 3 4 5 6 7 8 9 10 11 12 13 14 15 16 17 18 19 20 21 22 23 24 25 26 27 28 29 30 31 32 33 34 35 36 37 38 39 40 |
/* ************************************************************************** 14CORE |X-RF-ROVER-BOT Version 0,1 Test Code on Radio Link RF 434MHz ===== TRANSMITTER | TX ===================================================== ************************************************************************** */ #include <RCSwitch.h> RCSwitch SWCH = RCSwitch(); int XPOSITION= 0 ; // Joystick X POSITIONition int YPOSITION= 0 ; // JoyStick Y POSITIONition int POSITION = 0; int OLDPOSITION=100; int VAL1 = 0; int VAL2 = 0; void setup() { Serial.begin(9600); //Start Serial Communication at baud rate 9600 SWCH.enableTransmit(10); //Stard radio link transmitter } void loop() { VAL1 = analogRead(0); // Initializing the Joystick VAL2 = analogRead(1); Serial.println(VAL1); Serial.println(VAL2); if (VAL1> YPOSITION+30){POSITION=1; Serial.println(POSITION);} //Forward if (VAL1< YPOSITION-30){POSITION=2; Serial.println(POSITION);} //Backward if (VAL2> XPOSITION+30){POSITION=4; Serial.println(POSITION);} //Turn Left if (VAL2< XPOSITION-30){POSITION=3; Serial.println(POSITION);} //Turn Right if (VAL1>YPOSITION-20 && VAL1< YPOSITION+20 && VAL2>XPOSITION-20 && VAL2< XPOSITION+20) { POSITION=5; Serial.println(POSITION); //Stop } SWCH.send(POSITION, 23); } |
Sketch Code for Receiver
1 2 3 4 5 6 7 8 9 10 11 12 13 14 15 16 17 18 19 20 21 22 23 24 25 26 27 28 29 30 31 32 33 34 35 36 37 38 39 40 41 |
/* ************************************************************************** 14CORE |X-RF-ROVER-BOT Version 0,1 Test Code on Radio Link RF 434MHz ===== RECIEVER | RX ===================================================== ************************************************************************** */ #include <RCSwitch.h> //RCSwitch Library can be downloaded below RCSwitch SWCH = RCSwitch(); int POSITION = 0; //X & Y POSITION to 0 void setup() { Serial.begin(9600); pinMode(4,OUTPUT); //Motor Controller In 1 Pin Assigned to MCU pin 4 pinMode(5,OUTPUT); //Motor Controller In 2 Pin Assigned to MCU pin 5 pinMode(8,OUTPUT); //Motor Controller In 3 Pin Assigned to MCU pin 8 pinMode(9,OUTPUT); //Motor Controller In 4 Pin Assigned to MCU pin 9 SWCH.enableReceive(0); } void loop() { if (SWCH.available()) { int value = SWCH.getReceivedValue(); if (value > 0) { if (SWCH.getReceivedValue()==1){digitalWrite(4,HIGH);} //Forward else if (SWCH.getReceivedValue()==2){digitalWrite(5,HIGH);} //Backward else if (SWCH.getReceivedValue()==3){digitalWrite(8,HIGH);} //Turn Left else if (SWCH.getReceivedValue()==4){digitalWrite(9,HIGH);} //Turn Right else if (SWCH.getReceivedValue()==5){ digitalWrite(4,LOW); // Stop digitalWrite(5,LOW); // Stop digitalWrite(8,LOW); // Stop digitalWrite(9,LOW); // Stop } } SWCH.resetAvailable(); } } |
Downloads
Download RCSwitch Code Library Here | Zip
Wiring RFLink 433MHz Remote Controlled Rover Robot
There is a small problem idea.
As the system loses its range it remembers the last command.
Proszę, aby funkcja …
jeśli zakres jest poza związanym zerwaniem połączenia i zatrzymaniem silnika.
Zauważ, że to tylko pseudo kod. :)
Jeśli (radio == 0) {
silnik skręt Niski
silnik b skręcić NISKI
}