Another illustration how to wire the ESP8266 as server and client mode, therefore there is no need to use a router or smart phones to interact/communicate to the ESP8266, this is direct communication between 2 ESP module as server and client mode, ones the code is loaded the ESP8266 coded as server the client ESP8266 will automatically connect to the ESP8266 Server Access Point. As you can see the diagram on the ESP8266 client the push button is attach to pin D2 map on Arduino as GPIO pin 4 when button is pressed it will send a command to the server as value of 1 then the server will turn the D2/GPIO 4 to HIGH then LED light will turn on.
Required Components
- ESP8266 12/12E, ESP8266 7, ESP8266 NodeMCU, ESPDuino, WeMos.
- USB TTL UART / (Flashing/Programming the ESP8266 Module)
- Push Button
- Resistors
- LED
- Jumper Wire / DuPont Wire
- Solder Less Bread Board
- AA Battery
Wiring Guide
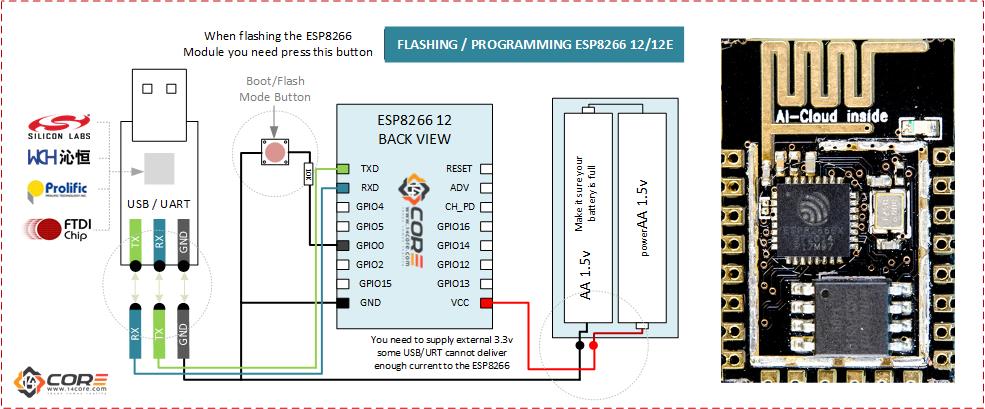
Programming / Flashing the ESP8266 12/12E
You need to install Arduino 1.6.8 from the Arduino website. available for Windows, Mac OS, and Linux (32 and 64 bit).
Open Arduino IDE and open the Preferences window then add {http://arduino.esp8266.com/stable/package_esp8266com_index.json} without bracket into Additional Board Manager URLs field. Note you can add multiple url separating them with commas. > http://arduino.esp8266.com/stable/package_esp8266com_index.json
Or you can follow this steps. http://www.14core.com/arduino-ide-with-esp8266-integration-for-ease-programming/
Source Code for Server
[crayon-690bb55d26ec7619064949/]
Source Code for Client
[crayon-690bb55d26ed1651940069/]
Downloads


