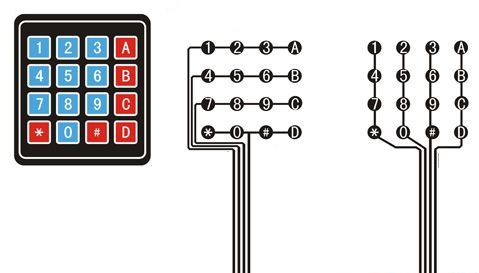
These keypad it is the same like computer keyboard, but rather the pressure pads that have only outline symbol printed on a flat, flexible surface. These membrane keyboard, which work by electrical contact between the key surface under layer circuit when key areas are press. See below the diagram of the membrane keyboard.
Membrane Keypad Schematic
Membrane Matrix Keypad Key Arrangement
1 2 3 A
4 5 6 B
7 8 9 C
* 0 # D
This keypad has 8 wires running from the bottom of the keypad, the wires connect in sequence from left to right and hook up to Arduino digital pin 2-9. You can get the Library from Arduino IDE, The following code below will allow you to test the keypad as each key is pressed, the corresponding character should appear on a separate line in IDE serial console.


