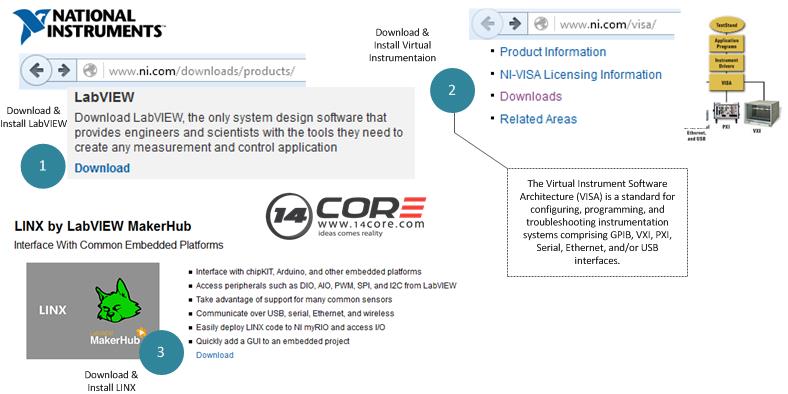
In this illustration we will going to hook up LabVIEW (Laboratory Virtual Instrument Engineering Workbench) and Arduino together. We will going to connect an Arduino board to the computer and install a special package for LabVIEW and control the Arduino directly from LabVIEW. Below are the procedure how to install, configure and integrate Arduino Board to LabVIEW.
What is LabVIEW?
LabVIEW software is used for a wide variety of applications and industries, which can make it challenging to answer the question: “What is LabVIEW?” I have heard many conflicting opinions and debates over the years, so I thought it would be appropriate to take this opportunity to discuss what LabVIEW is.
LabVIEW is a highly productive development environment for creating custom applications that interact with real-world data or signals in fields such as science and engineering.
The net result of using a tool such as LabVIEW is that higher quality projects can be completed in less time with fewer people involved.
So productivity is the key benefit, but that is a broad and general statement. To understand what this really means, consider the reasons that have attracted engineers and scientists to the product since 1986. At the end of the day, engineers and scientists have a job to do – they have to get something done, they have to show the results of what they did, and they need tools that help them do that. Across different industries, the tools and components they need to succeed vary widely, and it can be a daunting challenge to find and use all these disparate items together. LabVIEW is unique because it makes this wide variety of tools available in a single environment, ensuring that compatibility is as simple as drawing wires between functions.
What is NI VISA?
The Virtual Instrument Software Architecture (VISA) is a standard for configuring, programming, and troubleshooting instrumentation systems comprising GPIB, VXI, PXI, Serial, Ethernet, and/or USB interfaces. VISA provides the programming interface between the hardware and development environments such as LabVIEW, LabWindows/CVI, and Measurement Studio for Microsoft Visual Studio. NI-VISA is the National Instruments implementation of the VISA I/O standard. NI-VISA includes software libraries, interactive utilities such as NI I/O Trace and the VISA Interactive Control, and configuration programs through Measurement & Automation Explorer for all your development needs. NI-VISA is standard across the National Instruments product line. With NI-VISA, you can feel confident that your software development will not become obsolete as your instrumentation interface hardware needs evolve into the future.
What is LINX?
The LINX by LabVIEW MakerHub makes it easy to interface with common embedded platforms such as chipKIT, Arduino, and NI myRIO as well as common sensors including accelerometers, temperature sensors, and ultrasonic distance sensors.
With this toolkit and NI LabVIEW software, you can control or acquire data from common embedded platforms. Once the information is in LabVIEW, you can analyze it using the hundreds of built-in LabVIEW libraries, develop algorithms to control supported hardware, and present your findings on a polished UI.
LINX provides firmware for common embedded platforms that acts as an I/O engine and interfaces with LabVIEW VIs through a serial, USB, wireless, or Ethernet connection. This helps you quickly move information from an embedded device such as a chipKIT to LabVIEW without adjusting the communication, synchronization, or even a single line of C code. Using the common Open, Read/Write, Close convention in LabVIEW, you can access the digital, analog, PWM, I2C, and SPI signals of many common embedded platforms or use higher level VIs to directly control sensors and actuators. LINX is open source so you can dig in and see how LINX works, or even contribute to the LINX project.
Required Component
- Arduino UNO/MEGA/NANO
- National Instrument LabVIEW software ( Download Here )
- National Instruments VISA ( Download Here )
- LINX by LabVIEW MakerHub ( Download Here )
Installation & Integration Guide
Wiring and Programming Guide ( Your First Program via LabvIEW)


