Arduino IDE is base on C/C++ after you getting the 14Core Arduino Kit Compatible you should install the IDE. Depending on Operating System used. The specific installation varies. Thankfully Arduino Team provides us a detailed installation process guide for most Operating System.
Download the latest version of Arduino IDE @ http://arduino.cc/en/Main/Software
Connect your Arduino Board to your computer using the USB Cable.
Installing the Driver
1. Plug your Arduino/Arduino Compatible/14Core Board, Windows will connect online and will try to install the driver automatically. the installation will be done automatically. If noy, follow the next steps.
2. Open the Device Manager and right then open My Computer and selecting control panel.
3. Search under the PORTS “COM & LPT”. You should see the open port named “USB Serial Port” Right Click and choose the “Update Driver Software option. see the illustration below.

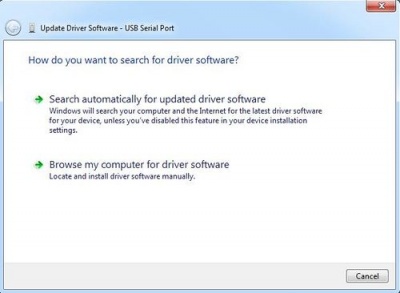
Select “Browse my computer for Driver software” option.
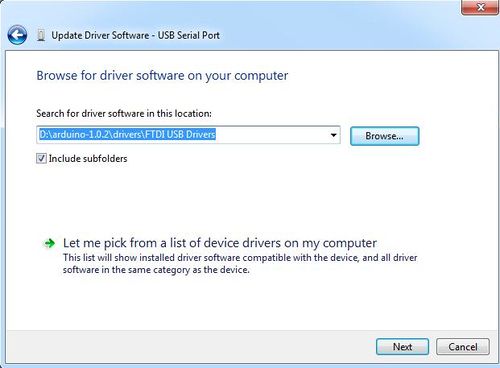
Find the driver FTDI USB Drivers, located in the folder in the Arduino IDE
Or download it here
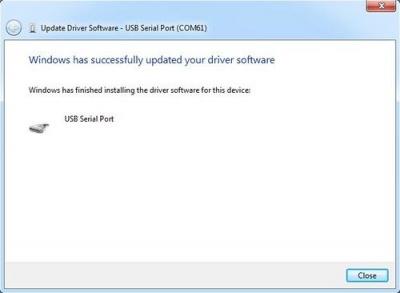
The FTDI driver installed successful
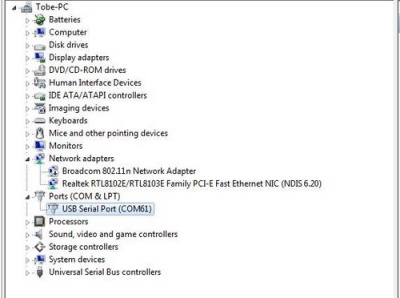
Check the Arduino Serial Port by Opening the Windows Device Manager
Download the FTDI Driver here | Uno R3 | Mega 2560 | Mini Pro | FTDI Driver


