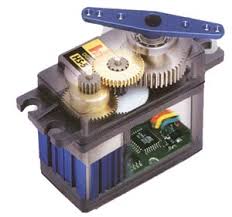
Servo motors mostly use in toy cars, airplanes, robots, industrial machinery, manufacturing, pharmaceutics. The servo circuitry is built-in inside the motor itself and has a positional shaft which usually fitted with a gear. The motor is controlled with an electrical signal which determines the movement of the shaft.


Servos are controlled by sending an electric pulse or PWM (Pulse with modulation, by controlling the wire. There is a smallest amount of pulse then maximum pulse and repetition rate.
A Standard servo motor can usually turn 90 degrees in direction for a total of 180 degrees turn, There is also a servo that’s turn 360 degrees mostly use in aerial photography by mounted on quad-copters and multi-copters. The motor’s center position is defined as the position where the servo has the same amount of rotation in both clockwise or counter-clockwise direction. The PWM(Pulse with Modulation) transmit to the motor determines the position of the shaft, and based on the duration of the pulse via the controller, the motor will turn to the desired point.
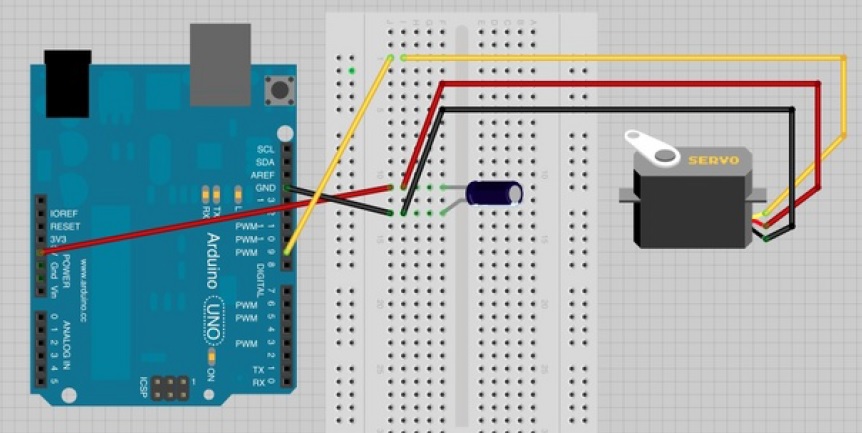
The servo motor receive a pulse every 20ms and the pulse length will determine how far the motor turns. Below are the example and guide how to control the servo on ARDUINO.


These serve motor it has 3 wires. 5v Female pin usually color Red , Ground will be black or brown and the Signal Female pin usually color white, orange or yellow.
Sometimes servo may behave randomly if you going to plug it in Arduino board. This is because the servo draws a lot of power especially when motor servo starting. if this happens the you need to hookup by adding a high value of 470uf capacitor or greater between ground and the 5volts.
Electronic Requirements for this Experiment
- Arduino UNO/MEGA/PRO
- 1x 470uf or Higher Capacitor
- Jumper Wire
|
1 2 3 4 5 6 7 8 9 10 11 12 13 14 15 16 17 18 19 20 21 22 23 24 25 26 27 28 29 30 31 32 33 |
/* 14CORE.com Servo Experiment */ #include <Servo.h> // Import Arduino Servo Library int SrvPin = 7 // Connect Signal to Digital Pin 7 Servo servo; int angle = 0; // Our servo positioning in degrees void setup() { servo.attach(SrvPin); } void loop() { for(angle = 0; angle < 180; angle++) // Turn from 0 to 180 degrees { servo.write(angle); delay(200); } for(angle = 180; angle > 0; angle--) // Turn from 180 to 0 degrees { servo.write(angle); delay(200); } } |
Servo motor are controlled by pulse and to make it easy to implement you need the Arduino servo library so that you can just instruct the servo to turn to a specific angle. To command the servo you to instruct the Arduino IDE that your going to use a servo on your project.


Pingback:RFID RC522 Gate Access Control with Arduino | 14Core.com