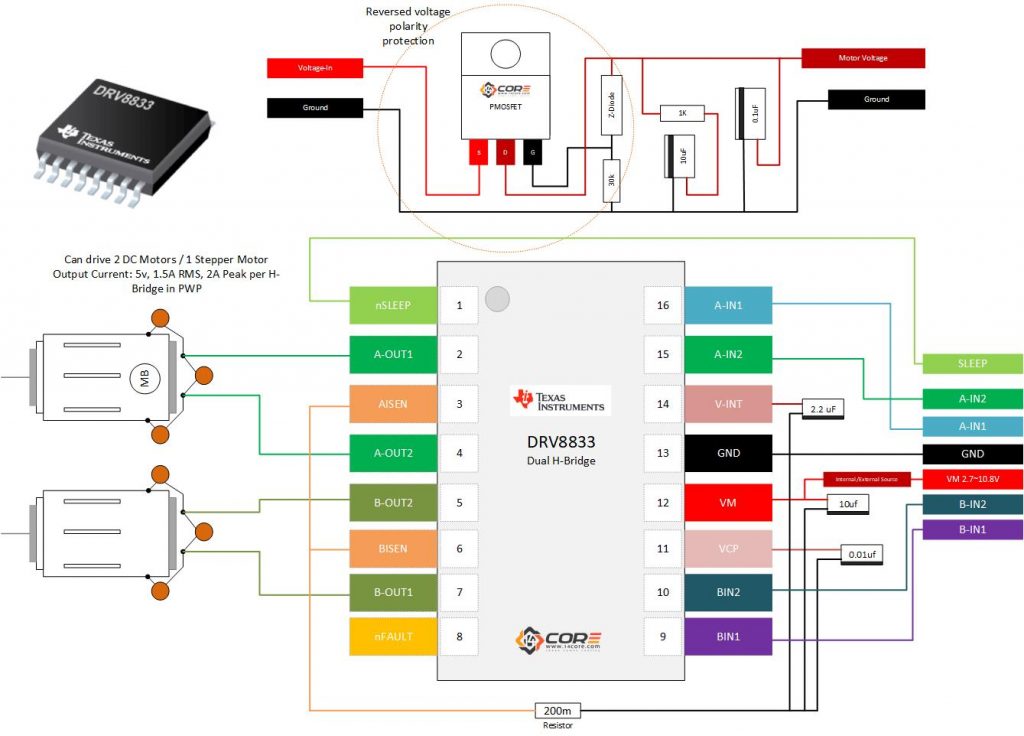
The DRV8833 is almost similar to DRV8871 it has also H-Bridge current control motor driver and also can drive a DC Motors and 1 Stepper Motor, solenoids, or other inductive loads. The difference between DRV8833 and DRV8871 is pin configuration and features DRV8871 has so called pulse sensing (internal Current Sense) PWM Control. The DRV8833 provides a dual bridge motor, which is can be used for robotics, mechatronics, toys, printers. Etc. The DRV8833 output driver block of individual H-Bridge consists of N-Channel power MOSFETS configured as an H-bridge behavior to drive motor windings. This also integrated shutdown functions with a fault output pin are provided for overcurrent protection, short-circuit, over temperature, under voltage lockout. The DRV8833 has also a low power sleep mode option. For more details please refer to the datasheet.
On this example we will going to wire the DRV8833 manually without using a prebuilt module were going illustrate the device using standard electronic components. See below diagram.
Required Components
- Arduino IDE | Atmel Studio | Energia
- Microcontroller – Arduino, NodeMCU, Teensy Board, TeensyDuino, ESP8266 12, 12E, ESP32, LinkItOne, ESP8266 NodeMCU, ESPDuino, ATMEGA328 16/12, ATMEGA32u4 16/8/ MHz, ESP8266, TI Evaluation Bord C2000, CC3200, MSP430 ,ATMEGA250 16 MHz, ATSAM3x8E, ATSAM21D, ATTINY85 16/8 MHz Note: The Diagram below is using NANO. (please refer to each MCU’s respective pin-outs)
- DRV8833 H-Bridge Driver / Module
- Capacitors
- Resistors
- Solder Less Breadboard
- Jumper Wire
- Prototyping Board (Optional)
Wiring Guide
Source Code
[crayon-67e9f0a934b05640045049/]
Downloads
Download TI DRV8833 H-Bridge DC/Stepper Motor Driver Datasheet | Pdf


