The ATMEGA328P is a CMOS 8Bit Microcontroller based on the AVR enhanced RISC architecture by executing powerful instructions in a single clock cycle. The ATMEGA328P achieves throughout put close to 1MIPS per MHz this empowers system designer to optimize the device for power consumption versus processing speed. For more detail about the ATMEGA328P please refer to the datasheet below.
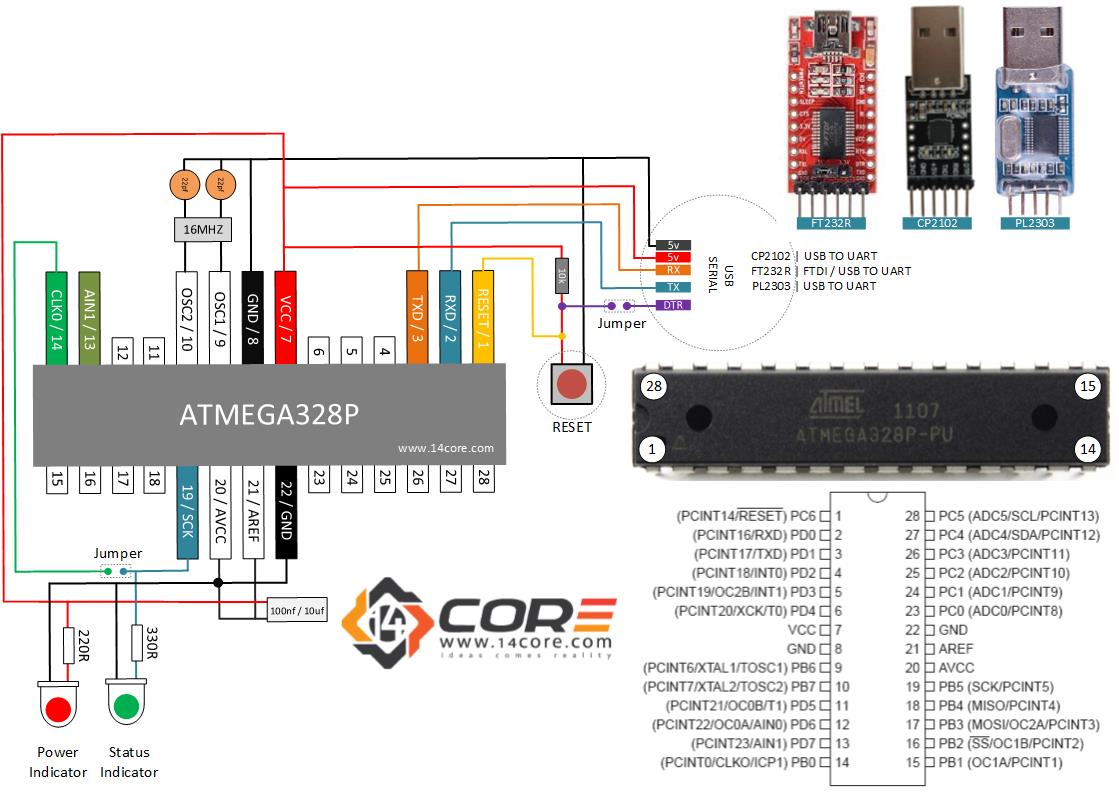
The standalone ATMEGA328P as Arduino can conveniently be divided into two ways. The ATMEGA328P with its associated support component of the USB to Serial interface to upload the sketch codes and to provide the serial communication that was to replace the parallel port. As you can see the diagram below it was design to used Arduino Bootloader to program the chip by using an empty chip / blank chip to easier ways to do programming using Arduino IDE. The associated support component are the 16MHz crystal 2 22pf ceramic or tantalum capacitors, tactile switch for RESET, 100nf polyester capacitor or 10uf electrolytic and resistors, and other requirements. The most important device is the UART Serial Bus to Boot load the ATMEGA328P.
The USB to Serial Converter has a supply of 5v + to the ATMEGA328P. As you can see the diagram I included a variety types of USB to Serial converter available in the market that can do the job but other converter does not have an auto reset feature in this case you need to reset or remove the jumper ones you’ve done the uploading the code. keep in mind that auto reset can cause some problems by initiating a reset when you connect other USB devices to the same USB Hub.
Required Components
- ATMEGA328P Microcontroller
- USB TO TTL Serial
- LED (for indicator)
- Capacitor
- Resistor
- Tactile Switch
- Jumper Wire / DuPont Wire
- Solderless Bread Board
- Jumpers
Wiring Diagram
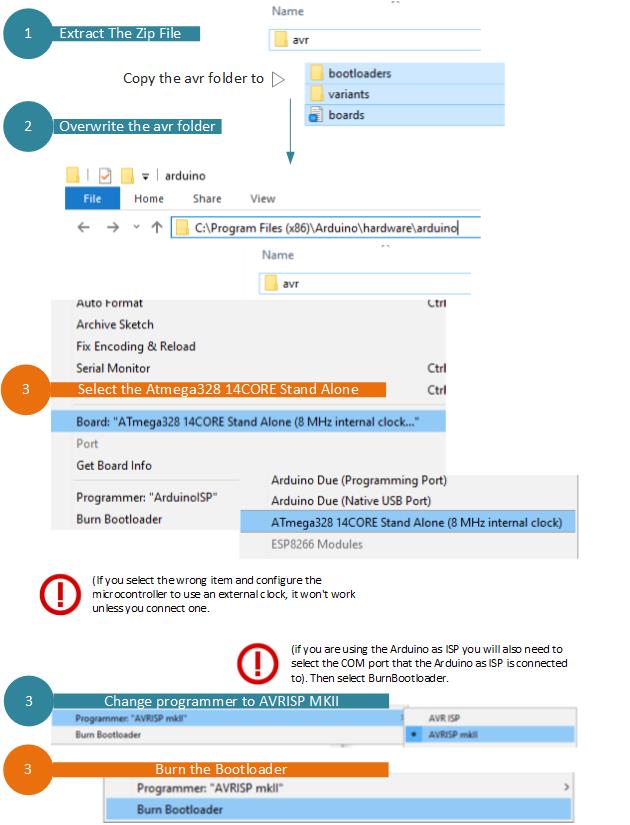
Boot Loading
Download this hardware configuration archive: breadboard-1-6-x.zip, Breadboard1-5-x.zip or Breadboard1-0-x.zip
Download
Download ATMEGA328P Datasheet | PDF


