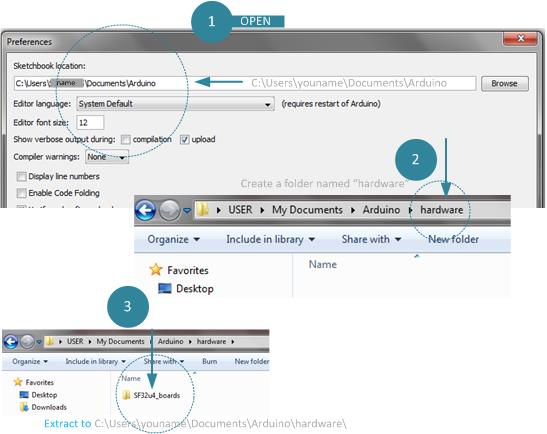
I this illustration we will going to install and configure the newly Micro Mini Pro Microcontroller Board. This board can run as Leonardo bard or using boot load SF32U4 boards. Below are the steps how to install and configure using SF32U4 on the Arduino IDE. The first step is you need to locate the Arduino sketchbook directory located at the Documents folder, you can verify by opening the Arduino IDE > Preference > see the steps below.
Required Components
- Micro Mini Pro Board MCU
- Download SF32U4 Boot Load and Driver
After you unzipped the folder named SF32U4 you need to create a hardware folder inside of the Arduino folder see below illustration for the structure of the folder.
Wiring the Reset Button
Boot Loading / Flashing Firmware
Demo Sketch Code
Downloads
Pro Micro Schematic Diagram
Pro Micro ATMEGA 32U4 Eangle File


